Canva Guidelines
Canva
Exporting Artwork For Print
If you’re submitting your artwork using the online layout application Canva, you will need to download the artwork as a PDF:
- On the menu bar, select the Share icon.
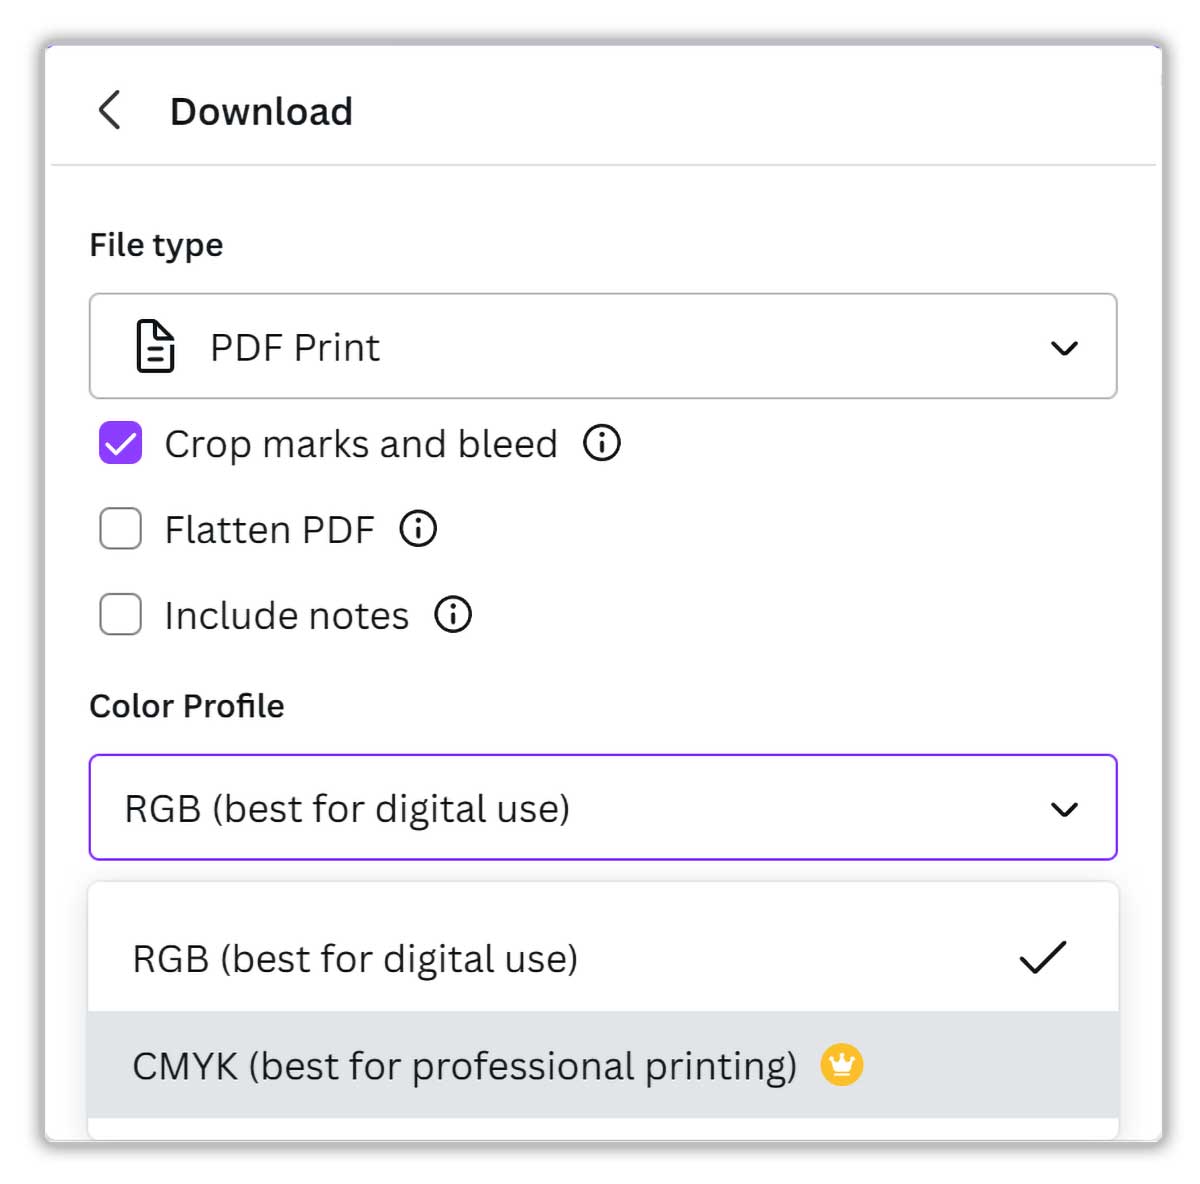
- Select Download.
- On the File type dropdown, choose PDF Print (Best For Printing).
- Tick crop marks and bleed.
- If your design has multiple pages, choose the pages you want to download from the dropdown, and select Done.
- On the Colour Profile dropdown, select CMYK. NOTE: CMYK is only available with paid version for Canva. While we can print RGB files, do note there may be shifts in colour when the artwork is converted to CMYK in our studio ahead of printing.
- Select Download.
To add bleed, crop marks, margins and other such features in your Canva layout, please refer to this article.
Canva
Setting Up Custom Sizes

If you’re submitting set up a custom artwork size in Canva, refer the following steps below. You can enter in a custom size for any type of print artwork you might want to set up.
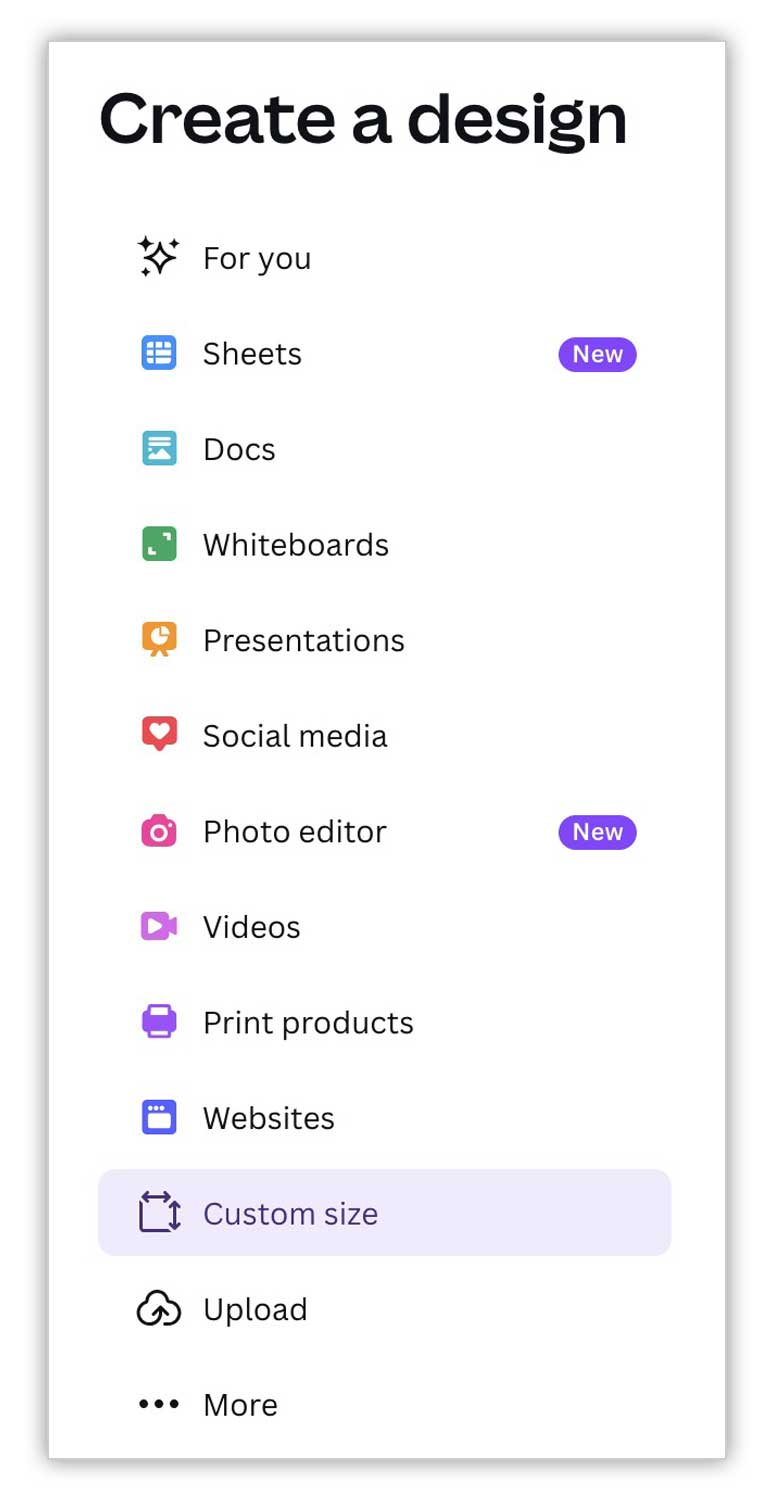
- In your Canva account, click Create from the top left corner of your main lefthand menu.
- In the resulting panel under Create A Design, click Custom Size.
- The next panel will show fields for width and height. Make sure you select mm from the Units dropdown.
- Enter in your custom size and then click Create new design.
Adobe Creative Suite Guidelines
Adobe PDF
If you are sending in a PDF make sure all of you images within the PDF are at least 300dpi. Also, these additional settings are required to submission of a PDF file to us for printing:
- Resolution: Choose High Resolution
- Compression Settings: Both Colour and Greyscale modes should be down sampled to 300dpi-350dpi with “auto compression” set on Maximum
- Font Embedding: Set to “embed all fonts”
Please note that the colour mode of your PDF needs to be set as CMYK not RGB. If you supply artwork as RGB, your artwork will be automatically converted to CMYK and my result in unexpected colour results.
Adobe Illustrator
If you’re building your artwork in Illustrator and save out as a PDF. Before doing so convert all of your fonts into curves (more info here). Use the guidelines from Adobe PDF above when saving your artwork out.
Please note that the colour mode of your PDF needs to be set as CMYK not RGB. If you supply artwork as RGB, your artwork will be automatically converted to CMYK and my result in unexpected colour results.
Adobe Photoshop
If supplying artwork created in Photoshop, make sure the artwork is at least 300dpi and in CMYK colour mode. You can then supply the file as Adobe PDF, JPEG or TIFF. It should be noted that Photoshop does not have the function to create bleeds or crop marks so if you have artwork where the graphics go right to the edge of the finished printed product, you may want to consider submitting the artwork in another program that does have bleed and crop mark functionality, such as Illustrator or InDesign.
Adobe InDesign
If creating your designs in InDesign, the best option is to export your artwork as a print-ready PDF. However, if you wish to supply the native INDD file, you will need to package all of your artwork and then put the resulting folder into a ZIP file. If supplying this way, please include a PDF as well as a fallback file should issues arise with working with your InDesign file.
For more information on how to package an InDesign file, please refer to more info this documentation.
Microsoft Guidelines

Microsoft Programs
Currently we do not accept native files in the following Microsoft Programs: PowerPoint, Excel, Word, Publisher or Works. If you have artwork built in any of these programs, you’ll need to convert or save out these files in PDF format first before submitting.
In most of these programs you can generally create a PDF, by either selecting Save As or when selecting Print, you can choose Save To PDF or Print To PDF.
Otherwise there’s a number of online PDF converters that will convert your Microsoft native file into a PDF. Many are free, including this one: convert.neevia.com.
Please note that it is important when supplying a PDF from a Microsoft document, care is taken to ensure any spot colours are created correctly in your original document.
PDFs from Microsoft programs are known to have issues where the resulting PDF may look different in appearance then the source native file. It is therefore advisable to supply screenshots of your Microsoft native layouts.
- PC/Windows: There is a Print Screen button on the keyboard
- Mac/OS: Press the Apple and Shift 4 keys, then highlight the area you wish to copy. This saves a PNG copy to your desktop.
Other Artwork Specifications
Standard Print Sizes
When submitting your artwork to print, please ensure your artwork follows the following measurement guide for various type of print products we offer:
- Business Cards: 85mm x 55mm
- A7: 105mm x 74mm
- A6: 148mm x 105mm
- A5: 210mm x 148mm
- A4: 297mm x 210mm
- A3: 420mm x 297mm
- A2: 594mm x 420mm
- A1: 841mm x 594mm
- A0: 1189mm x 841mm
Note that these dimensions cover landscape (wide) and portrait (tall) layouts.
If your artwork has graphic elements that go to the edge of the print, please make sure your artwork includes crop marks and a 3mm bleed (See more below). If you're using a print design program this is generally easy to set up.
Setting up artwork for die-cut labels
All of our die-cut labels are printed and cut to shape in-house using a modern digital printer that handles both cutting and printing. When setting up your artwork to have labels printed, please note that our printer prefers the following format and file setup specifications:
- An Adobe Illustrator AI file with all of the artwork on one layer and the cutter guide on another layer above that.
- The cutter outline should be 1pt, set to Overprint Stroke in the Attributes panel with a specific CMYK value of C=75 / M=68 / Y=67 / K=90.
- All artwork should be set up as a Print artboard in Illustrator set to CMYK colour mode.
- When sending us your AI file, please archive the artwork into a ZIP file.
- Please convert all of your type into outlines if possible and make sure any images are embedded in the file.
You’re welcome to send a PDF of the artwork built in the program of your choice that we can add in the extra elements needed for our label printer but please note the following:
- Make sure your PDF is set to the final size of the label with bleed and crop marks.
- Note that if your PDF is exported out of another program other than Illustrator, your artwork might not open up as intended when we set up your artwork as an Illustrator file. This might include things like colour gradients, images, incorrect colour modes in layout items (ie: RGB, spot colours).
In most cases we can easily set up supplied artwork as PDF that follows the above specifications for our printer, but we will inform you if your PDF is causing issues when we try and convert it. However, if possible, try and supply your artwork as an Illustrator AI file.
Bleed and Crop Marks
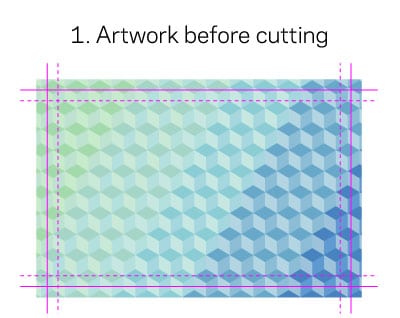
If your artwork has graphics that go right to the edge of the paper, you’ll need to see up your artwork with bleed and crop marks. Bleed is where the artwork goes usually 3mm extra outside of the page dimensions and crop marks are marked lines that show where the printing is to be cut to down to to make the final, finished size.
When it comes to bleed, we use the industry standard of 3mm on each edge of the document. In addition to that we recommend at 3mm safe zone inside the trim marks. This means your document should have an extra 6mm in total on each side.
The "safe zone" is an additional 3mm inside the cutting edge where no text or information should be put. Anything placed in this area has somewhat of a risk of being cut off.
To give you an an example of how bleed is used, let’s take an A4 document. Lined up with the correct bleed your artwork would cover an area of 216mm x 303mm and then from there be cut down to a finished size of 210mm x 297mm.
Imposition
If you are supplying files that are intended to be printed in a multi-page book or booklet, please supply the artwork as single pages. Do not supply the artwork as page spreads or printer’s spreads. London Print Room will do the necessary page imposition and set-up for printing in house in a manner that suits setting up the artwork correctly to go to print.
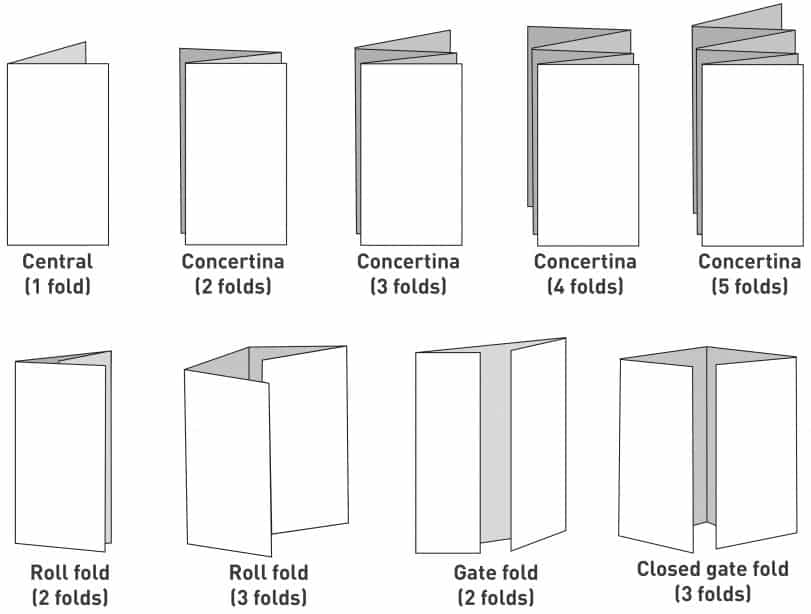
Folding Guides
If you are looking to get a folded brochure, here’s a visual guide to the different types of folds that are available.